Bowling Ball Art for the GARDEN
by
 |
| Bowling Ball Garden Art: The Four Gentlemen |
Lauren Espinoza
About two years ago, I began collecting old, worn-out bowling balls to create my own garden art. Glass covered balls and adorable lady bugs were the norm for bowling ball garden art on the internet. I wanted something different, something unique.
The hunt was on! However, bowling balls were hard to find. I found a few in garage sales, traded a nice one for one that was old and cracked, and found one in a pile of rubbish. I plopped my treasures down in my garden waiting for inspiration to transform my "trash" into works of art.
 |
| My Trash Treasures |
Inspiration was not a frequent guest at my home for an entire year! When my family decided to move from Texas to Colorado, my husband was very patient as I packed up my lovely bowling balls for the long trip. My blank canvases went from adorning one garden to another. There they sat for another 9 months.
 |
| Primed and ready for some paint and creativity |
Knowing that these works of art would adorn someone's garden, I looked for a garden theme and realized that the four seasons would be perfect. I started researching the four seasons and found The Four Gentlemen. The Four Gentlemen represent the four seasons (orchid for spring, the bamboo for summer, the chrysanthemum for autumn, and the plum blossom for winter) and have been used in Chinese art for centuries.
 |
| Mounted on candle holders and texture added |
Most of my artwork contains texture in some form. My garden art was no exception. I used Flexible Modeling Paste to create an interesting texture on the bowling balls. Three of the balls were mounted on bamboo candle holders. These gave the bowling balls a great variance in height and added some interesting perspective once the balls were placed in a garden.
 |
| Base colors |
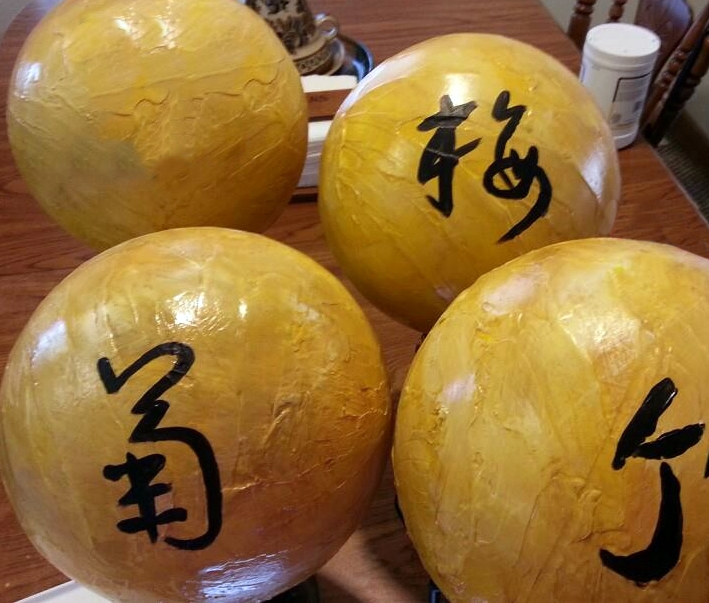
 |
| Bamboo - Summer |
I started with the bamboo. It was fun to paint and gave me the opportunity to establish the style of the pieces. The Chrysanthemum, Plum Blossom, and Orchid followed. Each piece had its own challenges. Each of the paintings was then covered in a high gloss glaze.
The final step was to cover each in a clear, protective polyurethane to protect them against the elements. The final product was gorgeous. These bowling balls are on sale through my Facebook page: https://www.facebook.com/pages/In-Life-Art-Studio/
Commissions are also welcome.
Copyright © 2013 Life's Casual Observer blog, Lauren Espinoza
 |
| Orchid - Spring |
 |
| Chrysanthemum - Autumn |
 |
| Plum Blossom - Winter |
The final step was to cover each in a clear, protective polyurethane to protect them against the elements. The final product was gorgeous. These bowling balls are on sale through my Facebook page: https://www.facebook.com/pages/In-Life-Art-Studio/
Commissions are also welcome.
 |
| The Four Gentlemen represent the four seasons (orchid for spring, the bamboo for summer, the chrysanthemum for autumn, and the plum blossom for winter). |


